

Lightning Effect
Cool lightning effect, if edited a little, it can serve as natural lightning for a photo. Try.
Also take a look at other Photoshop tutorials...
Slim button | Colorizing a Grayscale image! | Weathered stamp/flyer | Gold and Diamond logo | Chrome effect |
Lightning Effect
To begin with something, we will do the following:
1. Filter/Render/Clouds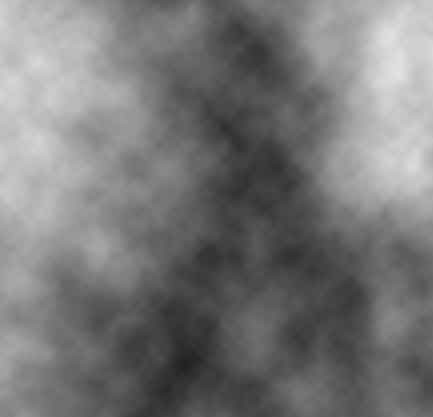
There are no bolt-like structures, so we will use the other filter, difference clouds. It will make sharper contrasts between brighter and darker areas. So, we do:
2. Filter/Render/Difference clouds
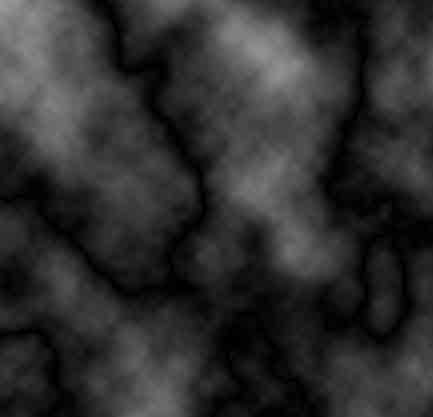
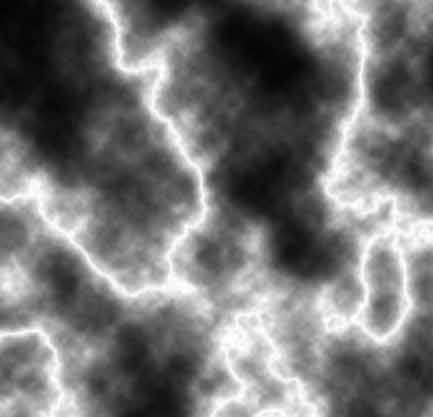
Now we have made more contrasting areas, with something like bolts but in black. To make the black color white, use the Invert function.
3. Image/Adjustments/Invert(Ctrl+I)
So we bave bolts white, but they are unneccesary wide and not sharp enough. So what we do is that we increase the contrast between white and black once again, now using levels.
4. Image/Adjustments/Levels (Ctrl+L)
In the case you wanted to have a little explanation of what does the shitf of the middle slider, it manages the balance between various degrees of white and black (so of the gray, right?). If we move it to the right, more of gray parts of the picture will become darker, or eventually black.
Sharp contrast, thats what we wanted.
Bolts itself dont have blue color (who studies physics, raise your hand and comment in the section below :) but the clouds and sky around when lighted can make that impression. Or perhaps the lightning IS blue. I dont study physics. Doesn t matter.
So, to give it more Electric look, use the following:
So, to give it more Electric look, use the following:
5. Image/Adjutments/Hue saturation(Ctrl+U)(Cross Colorize, Hue 220, Saturation 44)
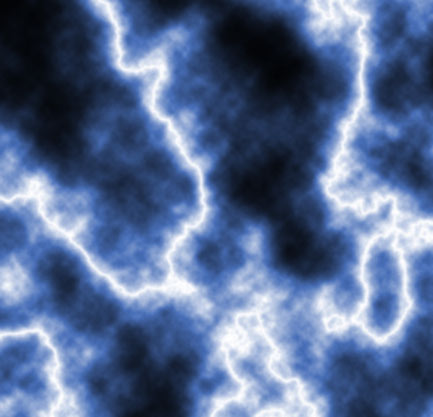
Because there is never balanced contrast in my pictures, we will use another tool to make the picture more contrast. Curves are really very poweful tool and if you wish clik on the following to get to Understanding Curves tutorial.
You might wish to alter the color a little (well I did) to get even more electric look.
7. Image/Adjustments/Hue saturation to fine-tune it (Hue 221, Saturatioin 55)

So we are here, what now? How we can use this effect?
I suggested one way myself, another than normal usage for design or so. So please have a look and try that as well.
Try Add lighting to your photo.
Good luck.
Enjoy
And if you happen to have a good idea of a tutorial (that is REALLY yours), you might wish to send us the procedure in text form and/or pictures and we will place it on our site. Be proud of what you can do.
I suggested one way myself, another than normal usage for design or so. So please have a look and try that as well.
Try Add lighting to your photo.
Good luck.
Enjoy
If you liked this tutorial (or even if you didnt :) please make a Comment and Vote in the section below.
Thank you.
Submitted by Martin on 2006-03-03 18:17:03. Since then read 67671 times.
Scored 4.56 points out of maximum 5 by 71 votes.
Also take a look at other Photoshop tutorials...
Autumn leaves | Vacation and holiday accessories tips | Making colorful web site template | Colorizing a Grayscale image! | Simple plastic button |
Rate this tutorial!
Invite a friend!
Discussion
shibu shibu_vjs AT yahoo DOT co DOT uk said on 2006-03-29 05:23:44good work
Kyle Simhdog AT yahoo DOT com said on 2006-03-31 00:54:24
clear or a white-yellow color is the color of lightning. It can be a dark / light ellow white but normally, depending on how the sky is at the moment is seen to the human eye as yellowish
Beren said on 2006-04-05 16:46:34
I have never ever seen a yellow lighning. In fact, when I actually did see the lighting for that split second, I think it was more of white than yellow. Anyway. I think the blue suits the effect, doesnt it? I might try the effect with yellow. It is quite hard to reproduce something that moves with the speed of light and what you see only for a split second :)
Mr. B. C. Phukan bcphukan AT indiatimes DOT com said on 2006-05-06 05:08:21
Martin ! This is simple yet very effective Tutorial.
. . . 80's Guy . . . said on 2006-06-15 04:44:51
VERY NICE! LOOKS GREAT!
AgentGOD agentgod AT gmail DOT com said on 2006-06-21 07:21:22
Very nice! It helped me alot.
Jen Sobe203 AT aol DOT com said on 2006-08-17 17:29:34
Nice tutorial - the only problem I have is when I go to Image > Adjustments > Hue/Saturation, I can only enter a value between 0 and +180, and your tutorial says to put in a value of 200+. I'm on Photoshop CS2.
MrsPippin mrstook AT msn DOT com said on 2006-11-02 20:47:15
This is awesome and totally cool! I love the tutorial and it helped me much.
steven steven DOT truppe AT chello DOT at said on 2007-02-03 15:56:13
First of all: THANK YOU FOR SHARING YOU PSP TRICKS ! It's nice to see how easy it can be to create nice effects without having to be an artist =).
Matt said on 2007-12-18 11:03:34
Great, thanks a lot, very useful!!!
Zack zack AT hiwiller DOT com said on 2008-04-07 16:21:34
Thanks for this. It was just what I needed!
ihaw ihaw89f AT yahoo DOT com said on 2008-11-17 09:53:18
yay i finally able to make lightning effect. Jen Sobe203, you might want to check the box of colorize first. People always forgot that.
Joshua jt3136 AT k12 DOT sd DOT us said on 2009-03-24 19:56:30
Okay, I have adobe CS3 and like 90 other photoshops from fireworks to like banner and stuff on my school computer and Im trying to get to use them better. I can usually get most of the stuff right, but you have to tell us how to start out in like the black and white because mine started in color and turned out with blue background and black lightning? Otherwise pretty...well very good tutorial
Ihaw ihaw89f AT yahoo DOT com said on 2009-04-02 18:13:28
Joshua, it is black background. There's option of it when you want create new document.
Joe said on 2009-08-07 04:51:22
I like your tutorial, I've learnt from it. thanks