

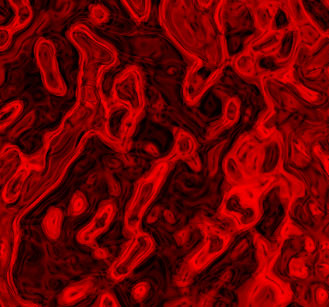
Red tissue
Biological outlook. Various colors to choose from. Really nice.
Also take a look at other Photoshop tutorials...
Pre-press tips for Photoshop users | Gold and Diamond logo | Tolkiens Master Ring | Vectors, paths, curves and arrows | Light in the Tower |
Red Tissue
3. Filter/Brush strokes/Accented edges (Edge width 5, Edge brightness 46, Smoothness 5)
4. Filter/Sketch/Chrome (I used Detail 6, Smoothness 6)
6. Edit/Fade, or press Shift+Ctrl+F to show the Fade window and fade last effect a little
8. Image/Adjustments/Gradiet map. Here you can use various settings. Click on the gradient in the Gradient map window and set the first colour Red and the second Black. Do this by clicking on those small thingies on the bottom corners of the gradient. Change the ballance btw. colours by placing the small dot in the middle bottom of the gradient nearer to red.

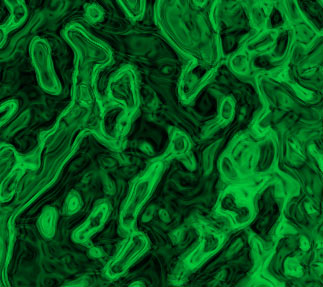
Or you can do the same with Green (01CB3A) and some Black. Enjoy.
Submitted by Martin on 2006-03-28 17:05:13. Since then read 42031 times.
Scored 4.07 points out of maximum 5 by 29 votes.
Also take a look at other Photoshop tutorials...
Weathered stamp/flyer | Crumbled old paper texture | Making colorful web site template | Alien text | Sparkling stars effect |
Rate this tutorial!
Invite a friend!
Discussion
nad nadideas AT gmail DOT com said on 2006-07-19 09:17:11oh its v simple v easy