

Add lightning to your photo
Adding lighting sound a bit hard but definitely is not. Check.
Also take a look at other Photoshop tutorials...
Comet or Shooting Star | Lightning Effect | Vectors, paths, curves and arrows | Weathered stamp/flyer | Easter Eggs in Photoshop and ImageReady |
Add lightning to a photo
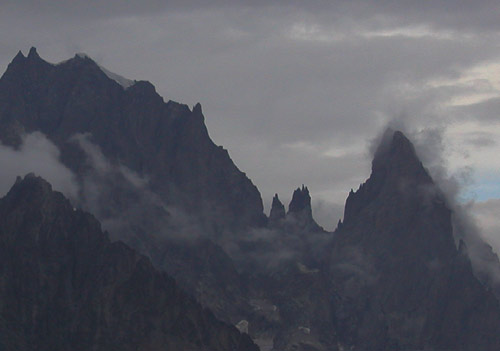
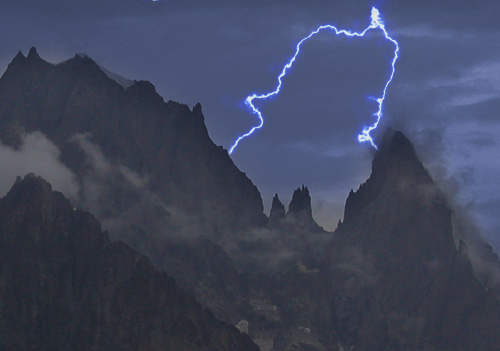
1. Open background picture. Something rather darker would be more preferable because the effect will not look nice on the light background.
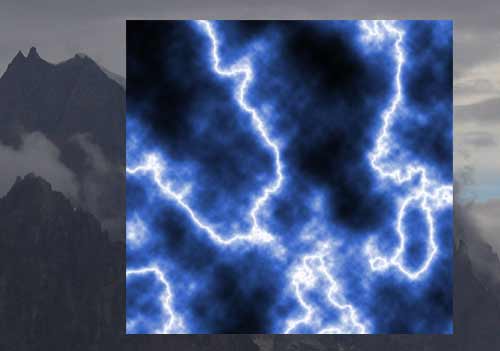
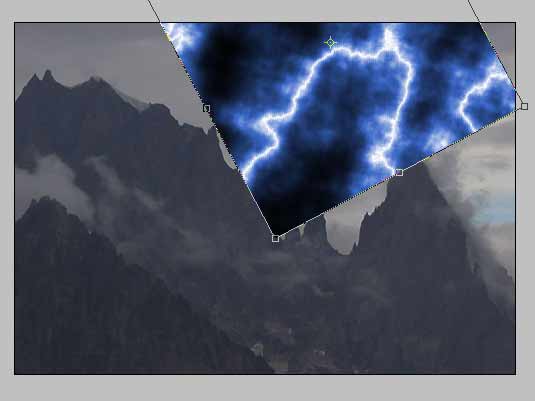
3. Chose suitable part of the lighning and rotate it to suitable position. If you did the previous effect (Lightning effect) on a picture with higher resolution, you can afford enlarging the bolts.
4. Use Eraser tool with soft tip to erase all unnecessary parts, such as other bolts or blue thingies between the bolts. None of these are desirable so just erase them, but softly.
The next thing to do is to swich the layer mode to screen.
What does it mean? Well, the screen mode basicaly means that the picture in this mode will interact with the other picture under it in one specific way. And that is that it will lightne all the parts of the underlying picture that are darker than the same parts in the upper picture. Clear, isnt it ? If not, just ask (comments section in the bottom).
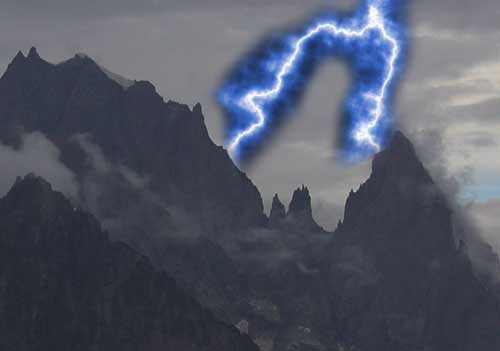
The scene is nice but not finished yet. In fact, the original photo is not dark enough so we will change its color a bit to give it more STORMY look.
5. Layer/New Adjustment Layer/Hue saturation (Colorize, 227, 25, -28), click on white layer mask left to the layer, use black brush to cover mountain and leave white for the sky.
5. Layer/New Adjustment Layer/Hue saturation (Colorize, 227, 25, -28), click on white layer mask left to the layer, use black brush to cover mountain and leave white for the sky.
6. Decrease opacity of lightning to 85%.
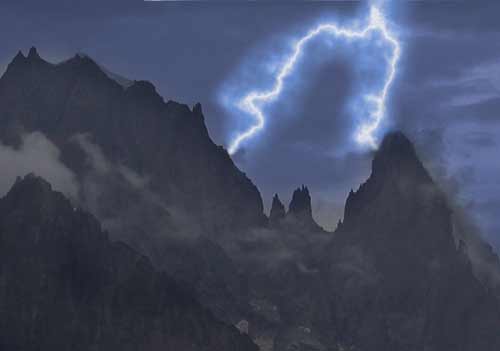
Looks better, doesnt it ?
So what now. To remove the thingies surrounding actual bolts, use the following:
7. Image/Adjustments/Levels
Thats it. Was it that hard? Definitely not and it looks realistic. A bit.
Enjoy.
And if you happen to have a good idea of a tutorial (that is REALLY yours), you might wish to send us the procedure in text form and/or pictures and we will place it on our site. Be proud of what you can do.
If you liked this tutorial (or even if you didnt :) please make a Comment and Vote in the section below.
Thank you.
Submitted by Martin on 2006-03-22 19:15:36. Since then read 70028 times.
Scored 4.7 points out of maximum 5 by 235 votes.
Also take a look at other Photoshop tutorials...
TV-lines | How to create a blueberry | Making abstract wallpaper | All about Layer Mask | Burning text |
Rate this tutorial!
Invite a friend!
Discussion
Tony tonyhill34 AT hotmail DOT com said on 2006-05-01 12:04:09How do you open a picture as a background ?? i'm tryig to add lightning to picature but i dont know how to open it as a back ground plz help :S
Martin mato AT t-tutorials DOT com said on 2006-05-01 14:44:08
You open just the photo you want. There is nothing like Open as Background. I am sorry for confusion. The thing is to open the Photo on which you want to add lightning and only then work with the lightning itself in the upper layers (in the layers above the original photo). I hope that it is clear. If there was any other misunderstanding, mail me and I will help you.
Tony tonyhill34 AT hotmail DOT com said on 2006-05-04 19:39:55
Thanks dude all done now and it looks funkay reccomend this tutorial
Martin mato AT t-tutorials DOT com said on 2006-05-05 08:25:27
Anytime.
Count Azurit said on 2006-05-14 12:11:49
Very nice ... only a small point from my expertise - lightnings tend to strike the highest points over the ground, meaning you may want to strike the peaks were you a lightning .. btw, are there any tutorials apart from yours ? =)
mysteryperson said on 2006-05-24 01:09:22
It's also easy to select the background and use paste into to the photo it comes out very nice also
Martin mato AT t-tutorials DOT com said on 2006-05-24 12:02:17
To Count Azurit, well, if I was a lightning, I would not bother with some rocky mountainsides. I would go somewhere up among clouds. Who cares about rocks and still lava? I dont :) And to the second part of your question, I produced (somehow) majority of tutorials. Rad made a few himself. I am so proud of myself. Ahhh. :D
Kinetic said on 2006-06-05 15:21:55
The tutorial is very simple and the final result is actually nice. Congratulations for posting this even though you could have made it better :P
Martin mato AT t-tutorials DOT com said on 2006-06-05 21:22:27
Yeap, as time passes by, I see that it could be done in much more precise way, more high-end I would say :))
Ken kentopia AT ameritech DOT net said on 2006-06-09 00:33:42
I am trying to use this lightning technique, but I am having problems with the screen mode.... When I merge all the layers, all the darkness for the lightning layer comes back! how do I get it to stay gone?
Martin mato AT t-tutorials DOT com said on 2006-06-10 23:41:31
To Ken. I am sorry, but I have not found any problem with merging the layers. I have opened my PSD file and when I try to merge the layers, no visible change occurs. I dunno. Perhaps try to use Save As option, or Save For Web. I dunno.
yushatak techmaster AT myself DOT com said on 2006-06-17 17:18:00
Though I haven't used Merge Down (Ctrl+E) much, if you were using that to merge, perhaps try Merge Visible (Ctrl+Shift+E) to merge your layers. This will cause the visible and not the entirety of the above lightening layer (the black) to show up. Hope I helped.
necro said on 2006-08-08 11:42:04
real nice , cept, i dun really understand it
Jen Sobe203 (at) aol (dot) com said on 2006-08-17 17:47:24
Once again, when you tell us to go to Layer > New Adjustment Layer > Hue/Saturation, you instruct the first number to be in the 200-range, but Photoshop only goes up to 180.
Martin mato AT t-tutorials DOT com said on 2006-08-18 17:13:00
Well, I do not have any means to check since I am not near my PC, but as soon as I get to it, I will find out. I will let you know whats the deal. I am pretty sure that the digits are right. Perhaps they are right for PS7.
Akelly adamkelly401 AT hotmail DOT com said on 2006-10-26 10:31:17
That was good but you should make a storm clouds tut too and combine them
bergen bergen AT webone DOT com DOT au said on 2006-11-19 12:51:22
Is this a stock image? I would like to use it in one of my projects.
Kyle said on 2007-04-18 17:24:12
it was really simple, and doesnt look that believable. for beginners this is a great tutorial, its straight to the point and everything, but its not very effective. sorry if i sounded harsh in any way
Martin mato AT t-tutorials DOT com said on 2007-04-21 14:42:44
I respect your opinion. The tutorial is for beginners, certainly, but I am sure also more experienced users can find it useful :D
tremur said on 2008-03-03 14:29:21
way to much work. Just place the lightning onto a picture, put it where you want it. Change its blending mode to lighten, and its done. No eraser or anything.
Ihaw ihaw89f AT yahoo DOT com said on 2009-04-02 18:15:41
yeah, i agree with the above opinion. change blending option is faster.
daniel rockgod520 AT aim DOT com said on 2009-04-11 09:26:44
i dont get step five could you please help
JDA hollywoodstrong16 AT yahoo DOT com said on 2009-07-22 07:54:28
Dude, i'm lost, what photo editing program are you using?