

Create a kite shield in Photoshop
Learn how to create a coloured kite shield with this photoshop tutorial
Also take a look at other Photoshop tutorials...
All about Layer Mask | Simple plastic button | Space flight simple | Add lightning to your photo | Gold and Diamond logo |
Pages
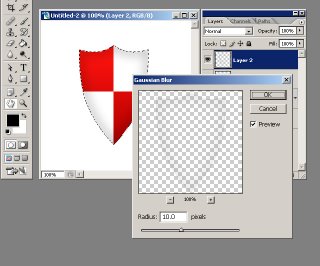
Click the OK button and with your selection still active got o Filter > Blur > Gaussian Blur and set the Radius to 10 pixels. You should have something like in the image below:
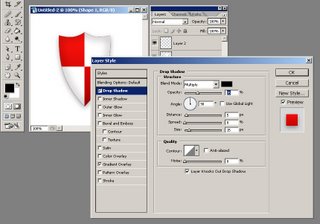
You need to add a shadow to your shield so double Click the shape layer again in order to see the Lyer Style options and choose Drop Shadow with the following values: Opacity 35%, Angle 90 degrees, Distance 5px and Size 15px, leaving the other options intact. Your shield should now look like this:
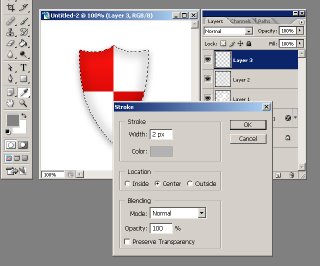
You see that the margins look really jagged and you don't want that CTRL+Click the shape layer in order to Load it's selection again and go again to Edit > Stroke. This time I want you to set the Width of the Stroke to 2 pixels, Color to #b3b3b3 and Location to Center. Click OK.
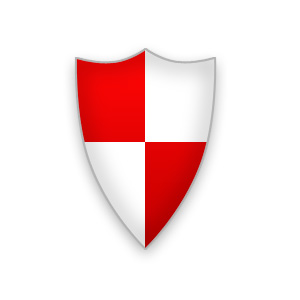
At the end of this photoshop tutorial you should have a nice shield like this one:
If you want to go a little further with the effects and styles apllied to the shield you can obtain something like I have below:

This tutorials was made by Andrei Bilan and is used by t-tutorials thanks to his courtesy.
Please visit the original page as well,
http://andreibilan.blogspot.com/
Pages
Submitted by Martin on 2006-09-23 20:05:12. Since then read 131896 times.
Scored 2.9 points out of maximum 5 by 40 votes.
Also take a look at other Photoshop tutorials...
Post-it-note | Burning text | Red Glass Button | Making sepia hue | Red tissue |
Rate this tutorial!
Invite a friend!
Discussion
No contributions yet.
Be the first one to add one!