

Create a kite shield in Photoshop
Learn how to create a coloured kite shield with this photoshop tutorial
Also take a look at other Photoshop tutorials...
Light in the Tower | Understanding Curves | Simple plastic button | GOLD - the golden writing | All About Adjustment Layers |
Pages
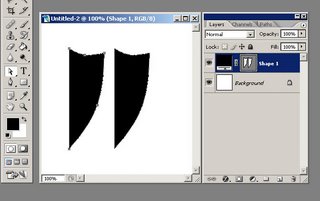
Using also the Direct Selection Tool press and hold the ALT key and when you approach the shape layer with your cursor you will see a little + appearing next to your tool. You need to click and drag your shape with the ALT key pressed (while holding the SHIFT key so that you can move in a straight line). You should obtain something like this:
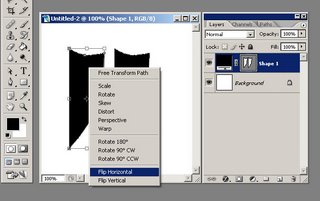
What you need now is to horizontally flip the new sub-shape you just created. For this press CTRL+T while your sub-shape is selected (if you deselect it you can reselect it by using the Path Selection Tool) and then right Click anywhere on the image and select Flip Horizontal from the options available, like you see below:
Now holding the SHIFT key simply drag the sub-shape until it joins with the other sub-shape:
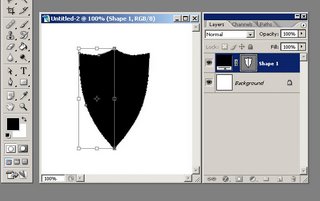
Press the ENTER key. There is you shield. Your image should look similar to this one below:

Pages
Submitted by Martin on 2006-09-23 20:05:12. Since then read 131897 times.
Scored 2.9 points out of maximum 5 by 40 votes.
Also take a look at other Photoshop tutorials...
Light in the Tower | Comet or Shooting Star | Making tiles | Creating a stylish portfolio | Pre-press tips for Photoshop users |
Rate this tutorial!
Invite a friend!
Discussion
No contributions yet.
Be the first one to add one!