

How to create a blueberry
Learn how to draw a blueberry with this photoshop tutorial
Also take a look at other Photoshop tutorials...
Understanding Curves | Autumn leaves | Sparkling stars effect | Post-it-note | Flawless Collage of two Panorama photos |
Pages
How to create a blueberry
This tutorial was made by Andrei Bilan and is used by t-tutorials thanks to his courtesy.Please visit the original page as well,
http://andreibilan.blogspot.com/
Welcome to another photoshop tutorial! As I was saying I try to have original tutorials or at least an original approach of some old tutorials. For this lesson, I thought maybe I can try to show how to do a blueberry. I had to do blueberry's for a client once and I thought I should make a nice tutorial for you. This may seem to be a very long tutorial but in fact it's not, I only took printscreens on every little step I made.
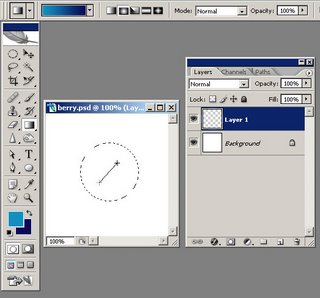
Create a new document of whatever size you want, mine is 300x300 pixels. Let's start by creating a circle with the Elliptical Marquee Tool, this must be a perfect circle not an ellipse so press and hold the SHIFT key while you are drawing with the Elliptical Marquee Tool. With your foreground color set to #1291c0 and your background color set to #0d0958 create a new layer, select the Gradient Tool and from the Gradient picker select Foreground to Background gradient (it's the first in the list) and then select the radial gradient style. Start dragging from one corner to another. Your settings should be like you see in the image below:
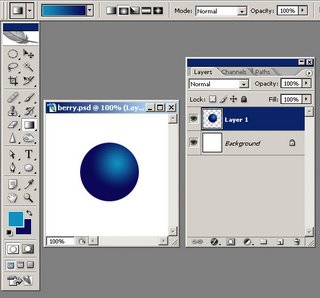
You results should be similar to this:
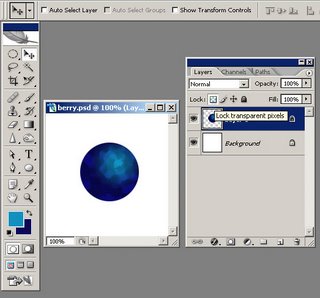
Now click the Lock transparent pixels icon (located in the layers palette, you can see on the next printscreen I took where it is located) and then go to Filter > Artistic > Sponge and use these settings: Brush Size set to 3, Definition set to 25 and Smoothness set to 9 and click OK.
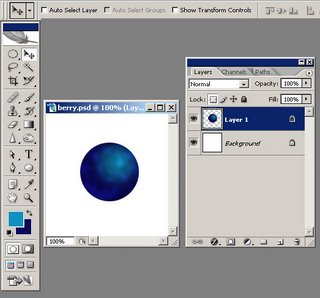
Now go to Filter > Blur > Gaussian Blur and set the radius to 2 pixels. You should obtain something similar to this:
Pages
Submitted by Martin on 2006-09-24 15:41:36. Since then read 73361 times.
Scored 4.61 points out of maximum 5 by 28 votes.
Also take a look at other Photoshop tutorials...
Slim button | Making tiles | Weathered stamp/flyer | Making colorful web site template | Colorizing a Grayscale image! |
Rate this tutorial!
Invite a friend!
Discussion
Angela said on 2008-03-14 04:08:21I like the effect, but the berry's a little too hard and unrealistic