Retouch of panorama
Play with the photo, change the reality.
Also take a look at other Photoshop tutorials...
Red tissue | Create a kite shield in Photoshop | How to create a blueberry | Professional Changing of the eye color | Easter Eggs in Photoshop and ImageReady |
Retouch of panorama
Retouches have always fascinated me. I see them as something between magic and pure graphic skill. It so quite easy, just remember to to everything easily, lightly, softly and naturally. No hard edges or artificial shapes. Just keep it natural.
1. Open the photo.
It will be much easier if you chose a photo with less details in the background, or at least one with the background that you are able to reproduce. A stone wall would be easy one, a brick wall a problematic one. Anyway, blue sky is way easy, and if you play with those clouds, I am sure you will agree that only the sky is the limit. Or maybe there is no limit at all. Just in your mind.
It will be much easier if you chose a photo with less details in the background, or at least one with the background that you are able to reproduce. A stone wall would be easy one, a brick wall a problematic one. Anyway, blue sky is way easy, and if you play with those clouds, I am sure you will agree that only the sky is the limit. Or maybe there is no limit at all. Just in your mind.
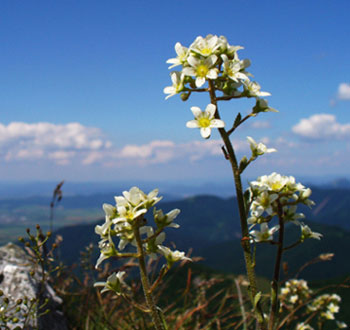
2. Start with the Clone stamp tool with soft brush tip. Press Alt to define what to take, release Alt and click to put down what you have taken. Easy start.
By this step, you have just removed the main parts of the object, namely of the plant. The boundaries are well visible but that was not the purpose of this step. The purpose here is to remove MAIN parts, not the details. So dont get anxious if it doesnt look perfect, that will be solved later :))
By this step, you have just removed the main parts of the object, namely of the plant. The boundaries are well visible but that was not the purpose of this step. The purpose here is to remove MAIN parts, not the details. So dont get anxious if it doesnt look perfect, that will be solved later :))
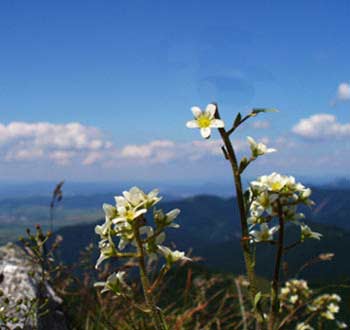
3. Remove like this what you want to get rid of. After erasing (or clonning) the main things, we will continue with the details. For this purpose, we can as well use Clone stamp tool with soft edges and middle size. What I used is combination of Clone tool, Healing brush and Blur tool. Remember not to overuse just one.
Try to combine them. It is just like in a strategy game, a one-unit-kind wont do the trick, but one with a variety of different units will compensate the weaknesses of the others.
Try to combine them. It is just like in a strategy game, a one-unit-kind wont do the trick, but one with a variety of different units will compensate the weaknesses of the others.
4. Use Healing brush for additional repairs, also use Blur tool with low strength (but use it softly, we dont want to have overblurred picture).
When using Healing brush (this applies also for Clone stamp but not completely), and when working on a background that contains a gradient, remember to use the color that is taken from somewhere to the right or left on to the plant, but not up or down (because the beckground in our case contains a horizontal gradient). If you added lighter or darker color, it would suggest that something in the picture is not as it should. Generally, use the color from a place as near to the object you are removing as possible.
When using Healing brush (this applies also for Clone stamp but not completely), and when working on a background that contains a gradient, remember to use the color that is taken from somewhere to the right or left on to the plant, but not up or down (because the beckground in our case contains a horizontal gradient). If you added lighter or darker color, it would suggest that something in the picture is not as it should. Generally, use the color from a place as near to the object you are removing as possible.
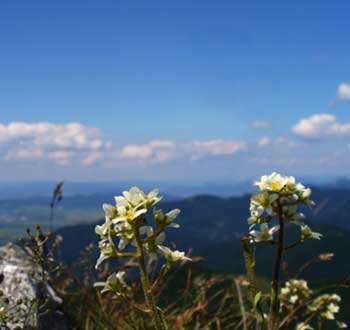
Often, you want to remove something even though you have no idea what is behind it. Well, that might be a bit problematic. But you can simply imagine what COULD be behind the object and just add what you think will suit the scene. Try.
What I did in the following pictures, I tried to remove the clouds. Nice thought, isnt i? th picture is your to judge if I worked well.
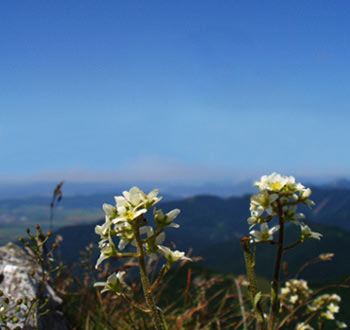
And finally, I said to myself that if I can remove clouds, why shouldnt I also add some? Lets see.
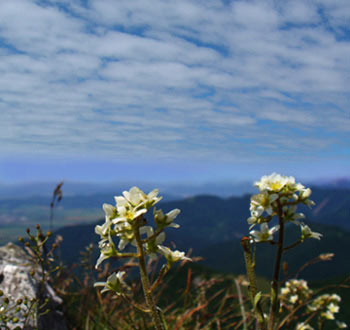
Personally, I am not fully satisfied with it. One of my friends said it looks (when rotated 180 degrees) like a view from a satelite.
Judge yourself.
Enjoy
And if you happen to have a good idea of a tutorial (that is REALLY yours), you might wish to send us the procedure in text form and/or pictures and we will place it on our site. Be proud of what you can do.
If you liked this tutorial (or even if you didnt :) please make a Comment and Vote in the section below.
Thank you.
Submitted by Martin on 2006-03-22 20:49:17. Since then read 27686 times.
Scored 3.72 points out of maximum 5 by 29 votes.
Also take a look at other Photoshop tutorials...
TV-lines | Bevel and Emboss tutorial | GOLD - the golden writing | Night Sky with Stars | Weathered stamp/flyer |
Rate this tutorial!
Invite a friend!
Discussion
Beren said on 2006-04-06 16:54:09really spectacular. mesmerizing. gosh, that really is awesome. How the heck could you remove the clouds and the plant thingy so neatly? I dont like the last pic. with those artifical clouds, doesnt look really natural. good one.
Int caligirl_inti AT hotmail DOT com said on 2010-06-23 08:11:09
heyy i love your work!! its spectacular!! im doing a personal projecta nd its based on photography can u please add me? i need abit more help on the eddittings! thanks in advance!

