

Creating a stylish portfolio
Get some ideas on how to produce a nice presentation of what you have designed to be shown to your possible employers.
Also take a look at other Photoshop tutorials...
Crumbled old paper texture | Slim button | Add lightning to your photo | Comet or Shooting Star | How to create a blueberry |
Pages
< Previous Page 1 Page 2
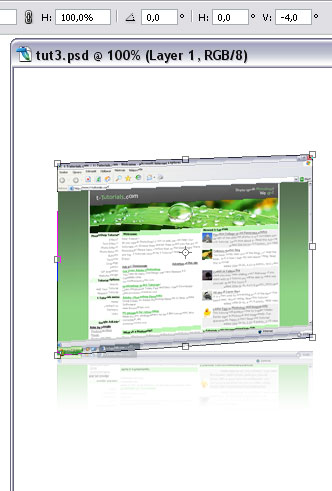
Lets imagine this is not just 2D thing, lets say it is "an object". Lets give it some perspective
using Free Transform Tool. Select the upper layer / image. Press CTRL + T to launch this tool.
With having center point selected (default, don't worry), set the angle to -2 degrees. Now, this is where you need to enable your 3D thinking. Do with it what you feel you need to do, but what looks good to me is: click on the right - bottom point, and move it upwards while holding ALT (cursor changes) - carefully and only vertically (holding SHIFT might help) until the Vertical degree changes to -4 degrees. Apply changes when done!
Now, finish the lower layer. OK, this is about what you like. If you want your fade out to copy the angle we applied, rasterize the layer. Please note you will not be able to change the Gradient Overlay parameters if you do it (you might want to duplicate the layer and make it invisible,
just in case you want to edit it again later) In layers, right click in layers -> Group into Smart Objects and then again but -> Rasterize. Very well. Now use Free Transform Tool again, just align it as you want to, but you want to get it nicely close to the real image. You may need to use Move Tool and move it a bit down first so that the left points (edges) connect.
Holding ALT and selecting this point, move it nicely:
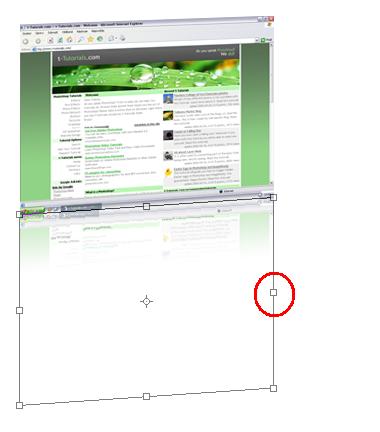
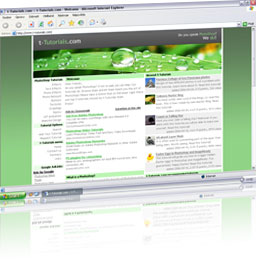
Now it looks cool!
So, you need to show what technologies you have been using. Find an image for each tech you used. With google no problem. I advice you to do the same procedure with each picture: first trim then change Image Size to constant number (30 pixels). Now you have all icons in the same size, merge the layers where you have them. To make it stylish, do the same reflection thing with them. Then, copy the website logo, and use some nice font to add a description to your website, what it does, why are you proud of it and so.
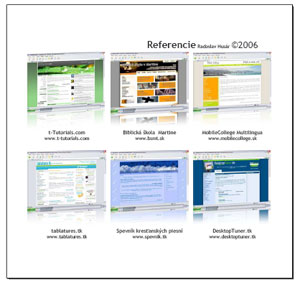
I got something like this for you, I hope you like it:
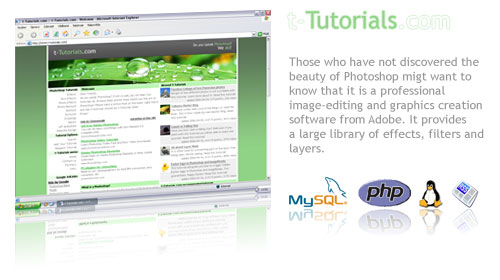
What I was going for is a page like this, but any ideas are welcome.
Non-Photoshop related addition
If you just can not host a website with this or you want to send it to your potential customer, use a free Open Office Org to create the document, with layout you need and then print it to pdf with free PDF Creator. Send it and done! You got the job! Congratulations!If you liked this tutorial (or even if you didnt :) please make a Comment and Vote in the section below.
Thank you.
Pages
< Previous Page 1 Page 2
Submitted by Radoslav on 2006-04-27 21:28:13. Since then read 92167 times.
Scored 4.04 points out of maximum 5 by 98 votes.
Also take a look at other Photoshop tutorials...
GOLD - the golden writing | Gold and Diamond logo | Retouch of panorama | Flawless Collage of two Panorama photos | Post-it-note |
Rate this tutorial!
Invite a friend!
Discussion
Kevin kevin AT planc DOT be said on 2006-05-14 15:28:52On a Mac you can do Command (apple) + shift + 3 to do the entire screen. You can also do Command + shift + 4 to select the area you want. As an added bonus: before selecting the area you want to capture when you do command + shift + 4, press the spacebar and you cursor will change in a little camera, that let's you take a screenshot of only one window.
Radoslav rado AT t-tutorials DOT com said on 2006-05-14 16:40:38
Good! That is a bit complicated. Well, thanx a lot. I ll update the tutorial. We, the crew of t-Tutorials should get a Mac... Martin, buy me one =D
Matt webmaster AT depiction DOT net said on 2006-05-14 17:49:32
The tutorial is good, however you gave it a very poor title. It doesn't actually show how to create a portfolio, just how to reflect images so they might look better when used in a online portfolio. P.S. Your website design looks like you got inspired off of Depiction.net. You should give then credit.
Radoslav rado AT t-tutorials DOT com said on 2006-05-17 16:21:45
Thanx Matt. Actually, look at the last pictures, those are the actual portfolios ;)
Saleem Shah imshah82 AT gmail DOT com said on 2006-08-29 22:26:45
The idea is quite getting inspiration for myself. In fact i am really inspired while exploring the Website and which take myself Go Hi!. Overall wonderful experience, i have very few words for appreciating the work you people done .
Fran C hawk DOT shango AT verizon DOT net said on 2006-10-15 03:28:48
This is very good. I am using the idea inspired to "reboot" my portfolio site. I have a suggestion tho for the reflection that I had gotten from another site. Instead of using Vertical from the Transform menu, when in the free transform state, why not just put the minus sign in the V box? That way, even the text can still be editable and whatever layer doesn't have to be ratized (sp).
Johannes said on 2007-01-04 07:13:36
you spelled might incorrectly
Rocky said on 2009-02-26 00:41:32
Very nice tutorial, i think you could cover using div tags in another extention of this tutorial? ill submit?