

Red Glass Button
Nice looking glass button, easy to make and very good looking. Can be used on your page or graphic projects.
Also take a look at other Photoshop tutorials...
Comet or Shooting Star | Sparkling stars effect | Making tiles | Alien text | Night Sky with Stars |
Pages
< Previous Page 1 Page 2
5. Then again click the thumbnail of the button layer but this time nudge it up and then again subtract its selection by pressing Ctrl+Alt+click on the button layer. Then fill it with white color in the new layer. But this selection should be very thin because only then it represents accurate highlight. Did u get that. And v r over with r button now we will add some text.

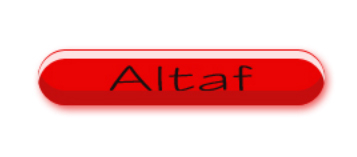
6. Add text with the type tool and place tat text layer above the button layer as it will represent that it sits inside the button as shown in the figure.
We have got a good sleek glass button u can use it in your projects, and more over this type of button plays very vital role in the internet and much more.
If anyone has doubt or if anyone has questions in photoshop feel free 2 mail me at altaf_ajju [at] hotmail [dot] com. Definely I will help u to come out of it.
Have Fun!
Tutorial made by our user ALTAF
Pages
< Previous Page 1 Page 2
Submitted by Martin on 2006-06-11 10:09:39. Since then read 52629 times.
Scored 4.45 points out of maximum 5 by 20 votes.
Also take a look at other Photoshop tutorials...
How to create a blueberry | Modern Art in Blue | Sparkling stars effect | Night Sky with Stars | Chrome effect |
Rate this tutorial!
Invite a friend!
Discussion
Visu visu_subhash AT yahoo DOT co DOT in said on 2006-06-24 00:55:54This tutorial is really amazing an it's the right place to start 4 the beginners of photoshop
Visu visu_subhash AT yahoo DOT co DOT in said on 2006-06-24 00:58:18
but i cant understand the nudge selection move can any1 tell me
Martin mato AT t-tutorials DOT com said on 2006-06-24 22:22:52
The point is, as it is shown in the picture, that you move the selection down a little (by arrow down when you have marquee tool) and then subtractions the other selection from it, leaving you with the final selection. sounds hard, but it aint :D